Introduction
Locus has two printers / scanners. One black & white printer (with color scanning) and one color printer.
Members can currently print up to 50 black & white pages per month at no charge. Please keep track of how many pages you print and let us know if you print more than 50 pages during any month.
Prices for black & white printing beyond 50 pages and for color printing are listed in the table on the Membership page in the Membership & Services section of the website.
If you have trouble connecting wirelessly, there is a USB data cable connected to each printer as well.
1. Brother MFC-L2700DW |
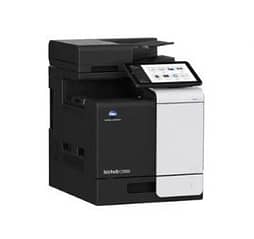
2. Konica Minolta C3350 PCL6
|
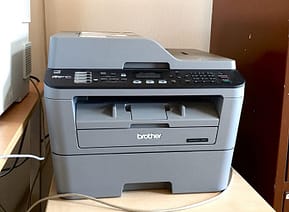
Brother MFC-L2700DW series Printer
IP address: 192.168.2.190
Wi-Fi network: Locus-500M
Brother Printer installation on Windows 10:
- Connect to Locus-500M Wi-fi network on your computer.
- Make sure that the printer is plugged into the electrical circuit.
- Open the Settings app from the Windows Start menu.
- Click Devices.
- Go to Printers and scanners section on the left.
- Click Add a printer or scanner.
- When Windows detects all the available printers, click on the Brother MFC-L2700DW series Printer and follow the on-screen instructions to finish the installation. And you’re done.
- Many members are having problems after the installation because the default driver in Windows 10 is not up to date. If the printer is printing white text on black background, remove the printer from added devices and reinstall the full driver from the Brother website following the instructions below.
Brother Printer installation on Mac OS:
- Connect to Locus-500M Wi-fi network on your computer.
- Click the Apple icon in the top-left corner of your screen.
- Go to System Preferences.
- Click on Printers and Scanners (on older Mac models, this will appear as Print & Scan under Hardware).
- Click the + sign below the list of printers. For older Mac models, you might have to click Add Printer or Scanner after you click on the + sign. You might also see printers detected by your Mac under Nearby Printers in the Add Printer or Scanner submenu.
Note: If you cannot click on the + sign, you might have to click the Lock icon at the bottom of the window. It might require your password to make changes in the Print & Scan menu.
- Select Brother MFC-L2700DW series Printer printer from the list.
- Choose the AirPrint in the Use field.
- Click Add. The printer will be added to the list of printers. You will be able to see this on the left-hand side of the Print & Scan window.
How to install the driver
Follow this link to download the driver (and additional desired software) directly from Brother.
Then do the following:
- Select your Operating System.
- Click “Search”
- Click “Full Driver & Software Package” in the table. It will lead you to the next page.
- Click “Agree to the EULA and Download” to download the driver.
- When the driver finishes downloading, open the downloaded executable file and follow the instructions to install.
- Add printer again following the steps 1-7 for the Brother MFC-L2700DW series Printer regarding OS you use, unless it was not added automatically after the driver installation process.
Konica Minolta C3350 PCL6
Color Printer
IP address: 192.168.2.126
Wi-Fi network: Locus-500M
Konica Minolta installation on Windows 10:
- Connect to Locus-500M Wi-fi network on your computer.
- Make sure that the printer is plugged into the electrical circuit.
- Open the Settings app from the Windows Start menu.
- Click Devices.
- Go to Printers and scanners section on the left.
- Click Add a printer or scanner.
- When Windows detects all the available printers, click on the Konica Minolta and follow the on-screen instructions to finish the installation. And you’re done.
Konica Minolta installation on Mac OS:
Follow the instructions in the video below.
How to install the driver
- Go to Printers & Scanners.
- Select the printer KONICA MINOLTA C3350 PCL6.
- Select the following: Printer Properties / Ports / Add Port.
- Select the option “Standard TCP/IP Port”. Then click on New Port / Next.
- Enter the following in the “Printer Name or IP Address” field: 192.168.2.126. The Port Name will be filled out automatically.
- Click on Next / Finish / Close / Apply / Close.
Basic printer instructions
- Press 1 to scan
- Press 2 to copy
- Yellow button: back to default settings
- Red button: putting the printing on hold
- No. of Sets = number of copies
- Nabídka / Job list: you’ll be able to see the printing queue
- Push when adding more paper sheets
Scanning instructions
Adding your email address
Press Nabídka / Utility / One Touch User Box Registration / Email / New / Enter your name and email address / Press on the “Favorite” button and enable it by pressing ON (this will help you to easily find your name for future scans) / OK
Scanning
Place the document on the scanner flatbed, facing up / Press button 1 / Click on your name (you should find it under “Favorites” if you selected that option. Otherwise, click on “Address Book” to find yourself) / Press the big blue button. You should immediately receive a copy of the document in your inbox.